
One of my highest priority DIY projects, out of the gate in retirement, was to improve the look of our primary bedroom. Years earlier, I made the mistake of painting it a creamy yellow which, with the Brazilian Cherry floor, and the orange-colored, pine furniture (with no rug under the bed) was just too much yellow on yellow on yellow. I knew immediately I didn’t like it. But it’s a lot of work painting a full room and I thought it might possibly grow on me. It never did. I hated walking in that room every day FOR YEARS because, I had other priorities.
The sad thing is that our primary bedroom was one of my favorite rooms when we moved into our house. It had very light (almost white) beige wall to wall carpet and lighter walls. Our furniture was more in style then and the contrast of the darker pine with the white carpet and light walls really did look good to me. Later when we needed to replace the carpet upstairs, I “improved” it by putting in the hardwood floors throughout the upstairs and painting the walls. All of the sudden, the room was too dark and everything looked off to me. Unfortunately, I don’t have a complete picture of the bedroom I hated. The pictures below are during the process of installing moldings but this gives you the idea of the old wall color and floors.

I decided I wanted to cool things off with white paint; but didn’t want bright white everywhere. To compromise, I decided on one accent wall with white wainscoting and a lighter, contrasting color on the walls to be decided later.
For a bedroom accent wall, I thought wainscoting panels that went 2/3 up the wall behind the bed would look good. The wall behind the bed was 17′ long. I built the wainscoting in our basement in 3 sections (using pocket screws) and my husband and son helped carry the 3 sections upstairs to be nailed to the wall.

I debated how to finish off the top of the wainscoting panels–either with a simple cap or a shelf. Since the wall was so long, I decided the shelf would give more options across the whole length of the wall.

The paint color was difficult. I wanted a contrasting cooler color and went with Ice Cube by Sherwin Williams.

The wainscoting stack up of materials from top to bottom is:
1″x6″ Shelf with 1″x2″ Edge (to make the shelf look thicker and to provide a shelf edge)
Pre-Made Corbels from Home Depot
1×4″ Rails and Styles
1″x5″ Bottom Rail Stacked on 1″x4″ Bottom Rail (leveled at the floor)–Note 1″x4″ Rail is hidden behind 1″x5″ Base
1″x5″ Base on Top of Bottom Rails with Separate Base Cap
Pictures of the finished room are shown below.
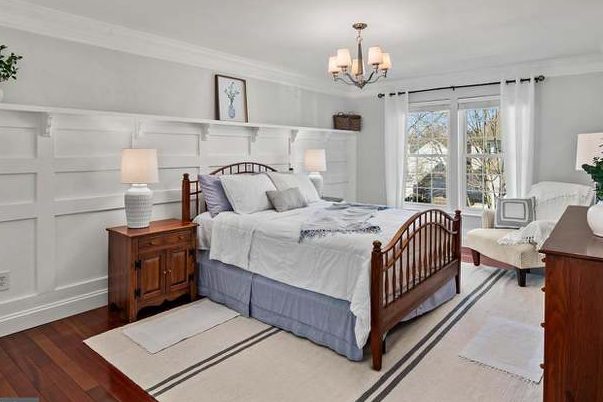

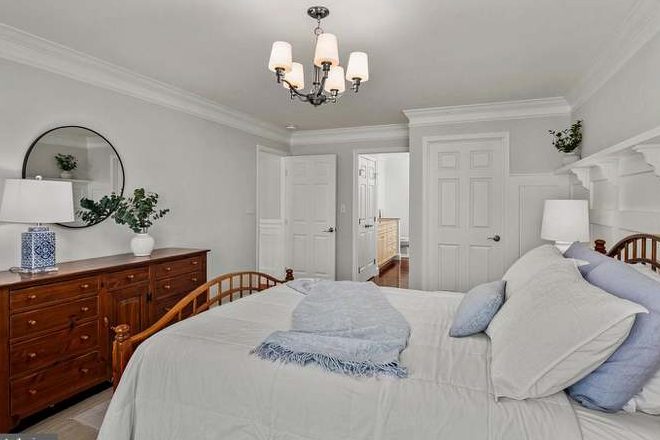
I loved how much brighter and lighter the room looked and how much less dominant the wood on wood was.
Tools Used–Compound Miter Saw for cross-cuts and angle cuts; Multitool for notching 1″x2″ at door jams, Table Saw with Bevel for rip cuts, Angle Finder, 16-Gauge Paslode Cordless Finish Nailer

Leave a comment